![]()
Your first controller
In the "Getting started" section we used the generic controller that is shipped with XSockets. Now we will create our own controller with the same functionality as the generic controller. In fact, expect from the name of the controller it will be identical with the generic controller used in the getting started section
What is a controller?
A controller can be compared to a MVC controller, but there is a very big difference. In XSockets we have state in the controller, this means that each client has its own instance of the controller. Thanks to state it is really simple to target subset of connected clients based on the state of each client. This might feel a bit abstract, but is very easy and powerful once you get the idea.
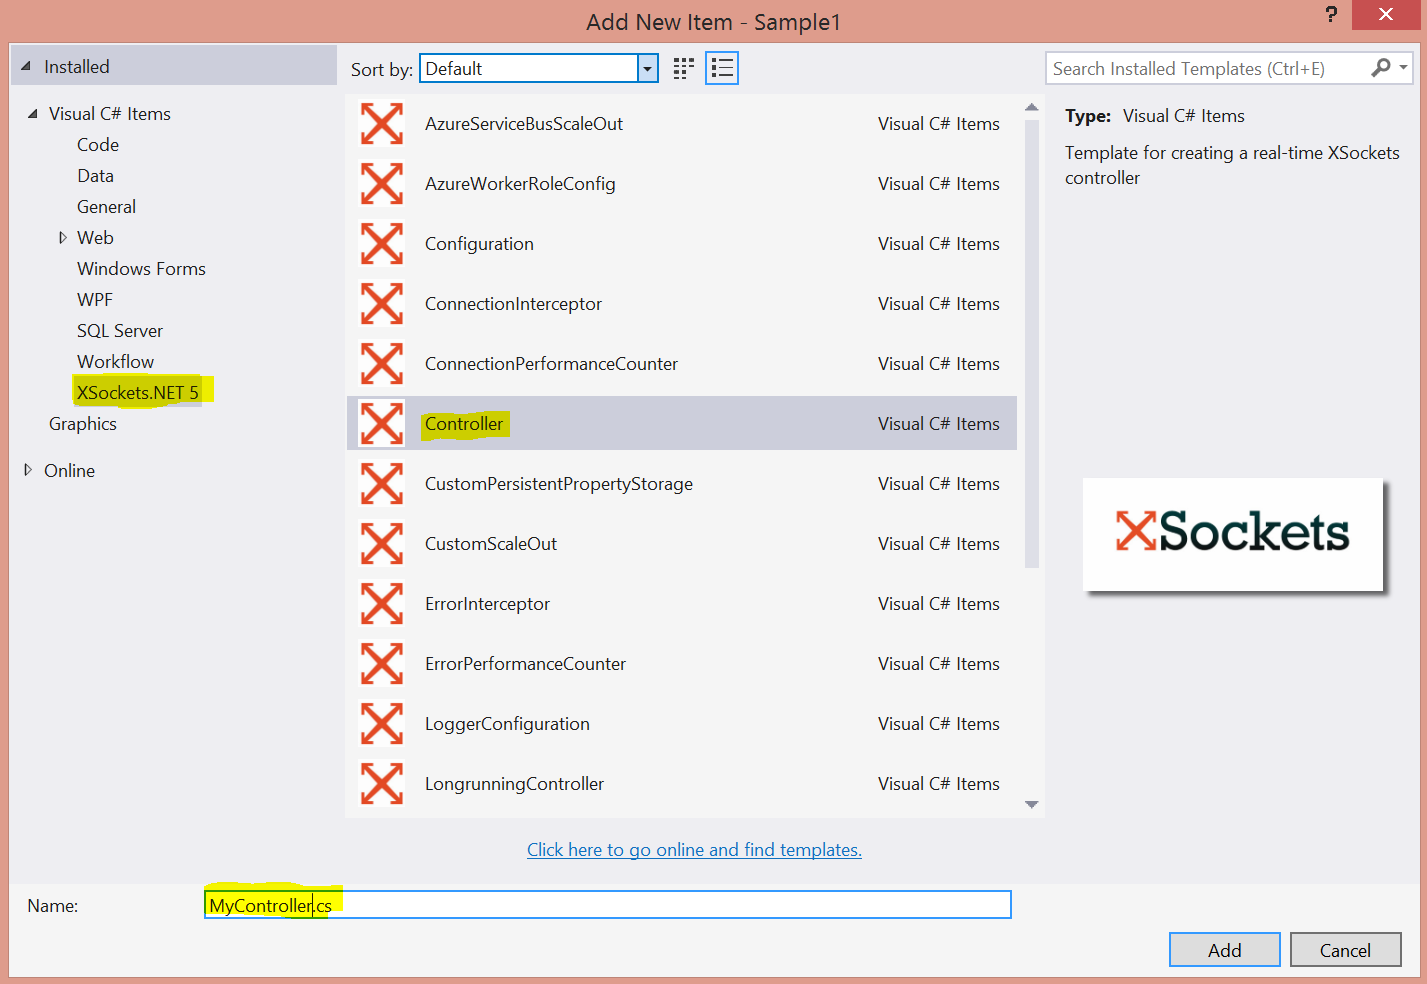
Add a new controller
Right click the project and choose Add -> New Item (or use ctrl + shif + n).
Then choose the XSockets.NET 5 section in the templates and select the controller template.
That will provide this class
using XSockets.Core.XSocket;
using XSockets.Core.XSocket.Helpers;
using XSockets.Core.Common.Socket.Event.Interface;
using System.Threading.Tasks;

namespace XSocketsTutorial
{
    public class MyController : XSocketController
    {
        public override async Task OnMessage(IMessage message)
        {
            //Send the message to all clients connected to this controller
            await this.InvokeToAll(message);
        }
    }
}
The code above will provide what we call simple messaging, there is no sophisticated logic involved nor any model binding.
In the sample above we broadcast all incoming messages to all clients that is connected to our controller. This is done by using InvokeToAll, all invoke extensions use RPC / RMI. Broadcasting can be a security issue and waste of resources, therefor you can also use InvokeTo to get fine grained control over who you send the message to. The InvokeTo and PublishTo extensions will be covered later.
Test your new controller
The easiest way to test your controller is to use Putty as shown in the "getting started" section.
So just replace generic with the name of your controller (mycontroller in this sample).
IMPORTANT: The use of Putty is just for quickly getting up and running, you will ofcourse use other clients in real-life :)
1. Connect with Putty
Open up putty and connect to the server. Since we use the auto-configuration we will connect to localhost and port 4502.
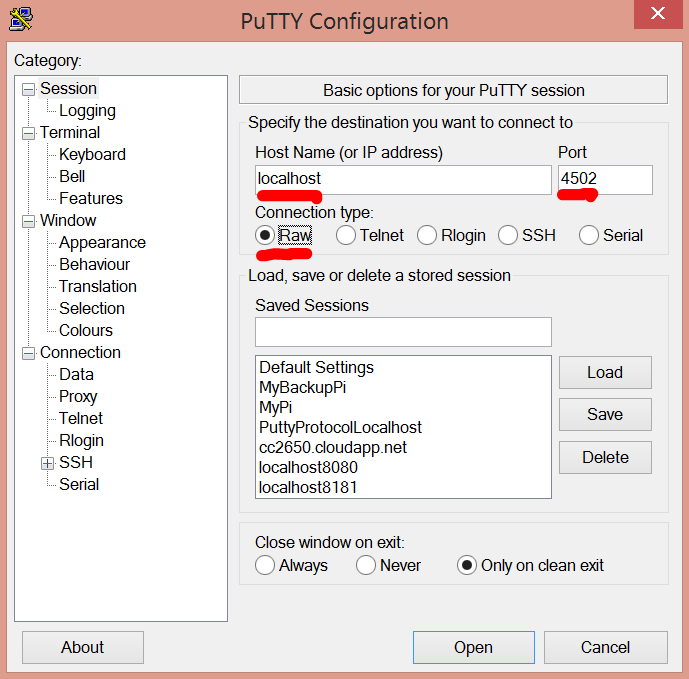
Do note that we use the "raw" connection
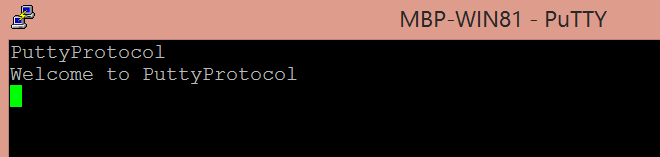
2. Send Handshake
Now we have a socket open between Putty and the server. However, for the server to be able to know what protocol we want to use we have to send a handshake.
So we just type in the handshake of the simple built-in PuttyProtocol which happen to be PuttyProtocol
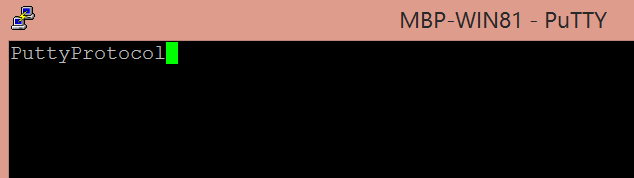
Now the server knows in what way the client will communicate, and the protocol responds with a welcome message (the handshake response).
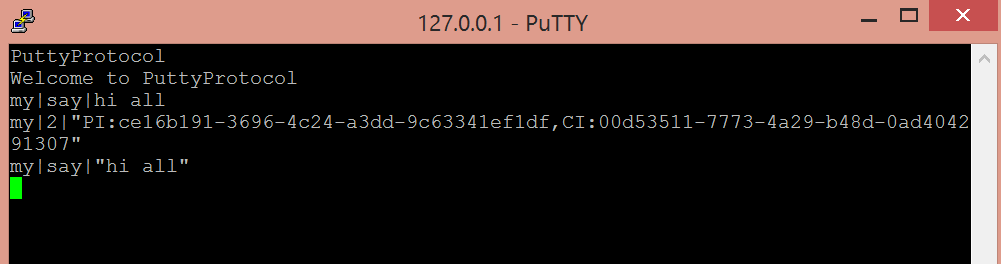
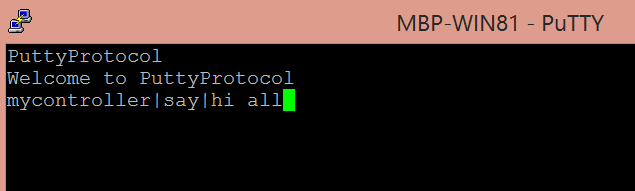
3. Send message to MyController
As already seen in the getting started section the simple PuttyProtocol expects you to send data in the format controller|topic|data
So to use our new controller we have to type mycontroller|sometopic|some message
The topic and data parts can be anything
so when we send this message and all connected clients will get back my|say|hi all
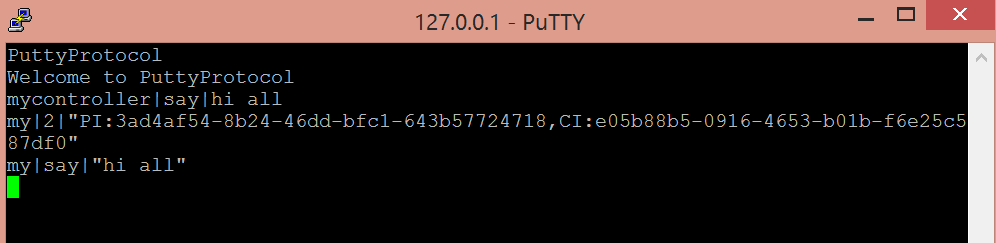
As you see the first message we got back was some information about the connection. You can read more about that in the section about XSockets protocol. You may also have noticed that the server only sent back my instead of mycontroller. This is because the controller suffix is optional and the server will remove that part in communication to save bytes.
So you can use the shorter way and just type my|say|hi all and it will work the same way.