- XSockets.NET - Version5
- Introduction
-
1. The Basics
- 1.1. Getting Started
- 1.2. Your First Controller
- 1.3. Add Your License
-
2.
Architecture
- 2.1. Everything is a Module
- 3. Configuration
-
4. Logging
- 4.1. Default Logger
- 4.2. A Custom Logger
-
5. Controllers
- 5.1. Lifetime Events
- 5.2. Communication Patterns
-
6. Hosting
- 6.1. Self-Hosted
- 6.2. Owin
- 6.3. IIS
- 6.4. Virtual Directory
- 6.5. Azure Worker Role
-
7. Security
- 7.1. Authentication
- 7.2. Authorization
-
8. Protocols
- 8.1. Responsibility of a Protocol
- 8.2. Custom Protocol
-
9. ScaleOut
- 9.1. Default
- 9.2. Azure Service Bus
- 9.3. Custom
- 10. Nuget Packages
Getting started
If you have used XSockets.NET before you will probably not need this guide.
In this sample we will not even write code, we will just create a new project, install XSockets and then connect to the built-in "generic" controller to send some messages around.
We will do so by using a very basic protocol written for Putty (or raw sockets).
Do not worry about concepts such as protocol and controllers, we will cover these topics later on.
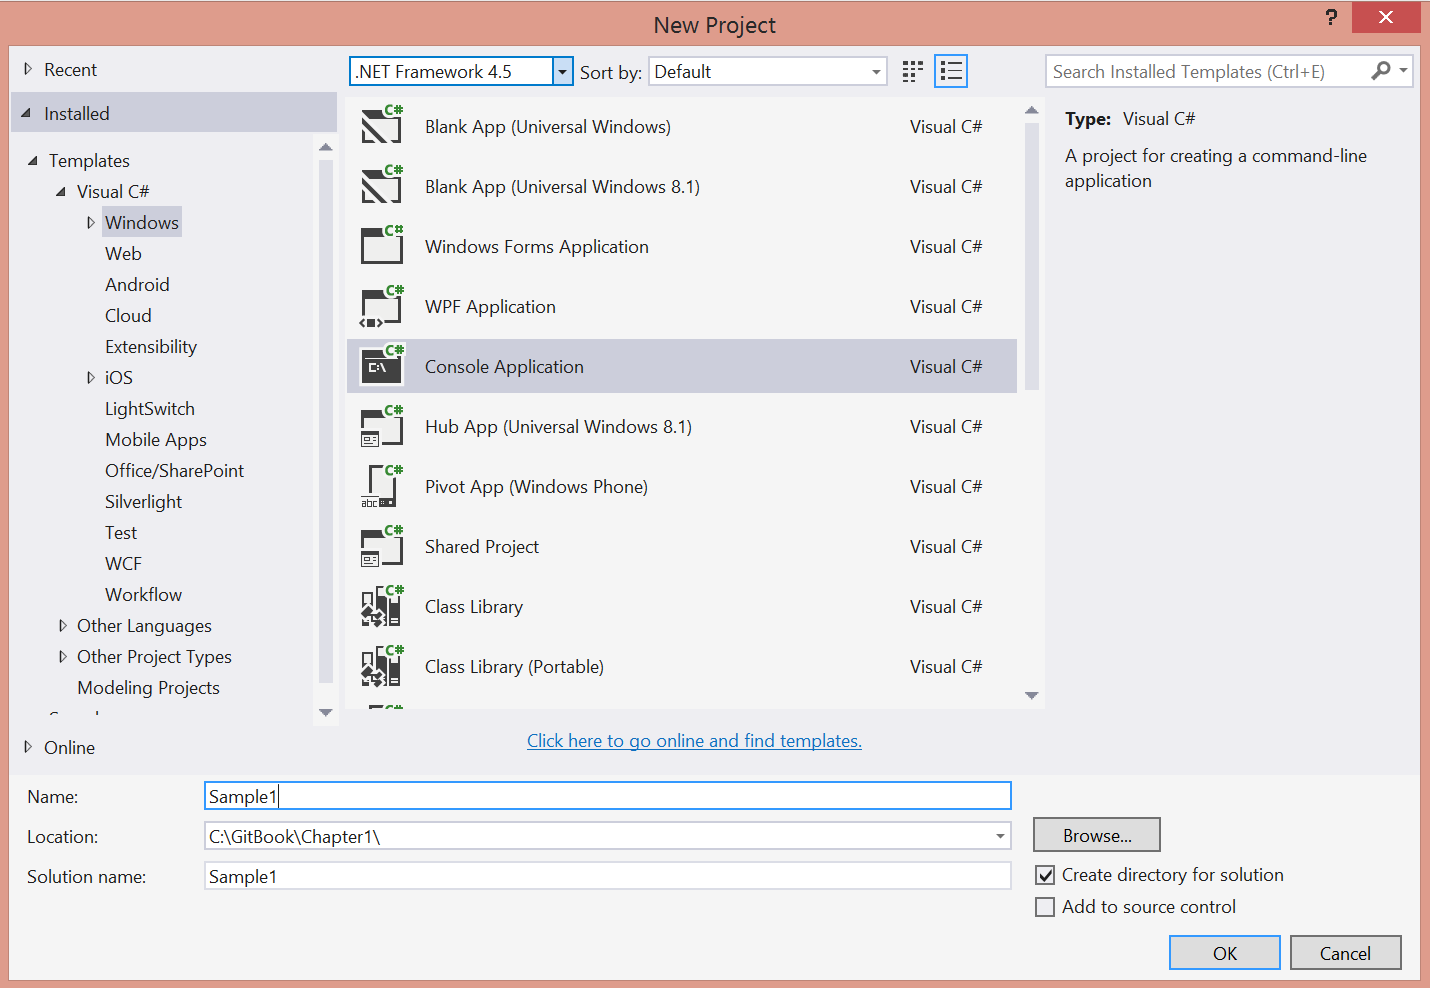
1. Create a new project
In visual studio, create a new Console Application (C#).
2. Install XSockets
Open up the package manager console, you will find it under tools -> nuget package manager -> package manager console
In the package manager console type Install-Package XSockets and hit enter

This will add the assemblies of XSockets and also install Serilog (for logging) and Newtonsoft.Json (for serialization).
3. Add some code
In the project you got a new folder named XSocketsNET, this folder contains a file with a simple sample for starting a server.
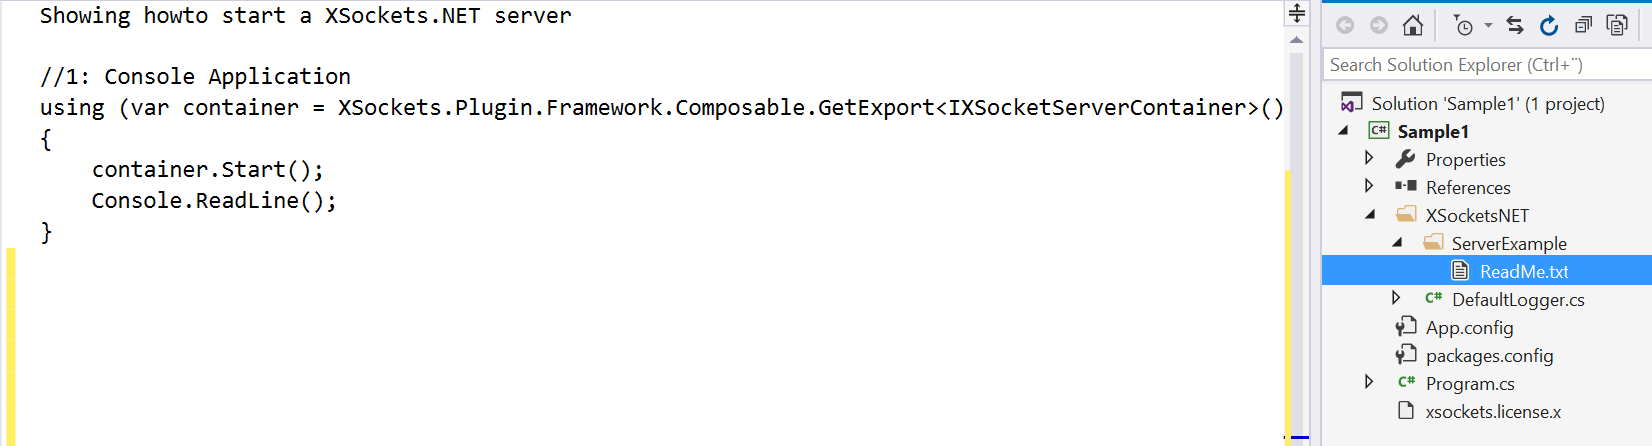
Copy that code into the main method of the program.cs file.
Notice that you also have to add the namespace using XSockets.Core.Common.Socket;
using System;
using XSockets.Core.Common.Socket;

namespace Sample1
{
    class Program
    {
        static void Main(string[] args)
        {
            using (var container = XSockets.Plugin.Framework.Composable.GetExport<IXSocketServerContainer>())
            {
                container.Start();
                Console.ReadLine();
            }
        }
    }
}
4. Start the server
Just it F5 or press the start button and you will see something like below.
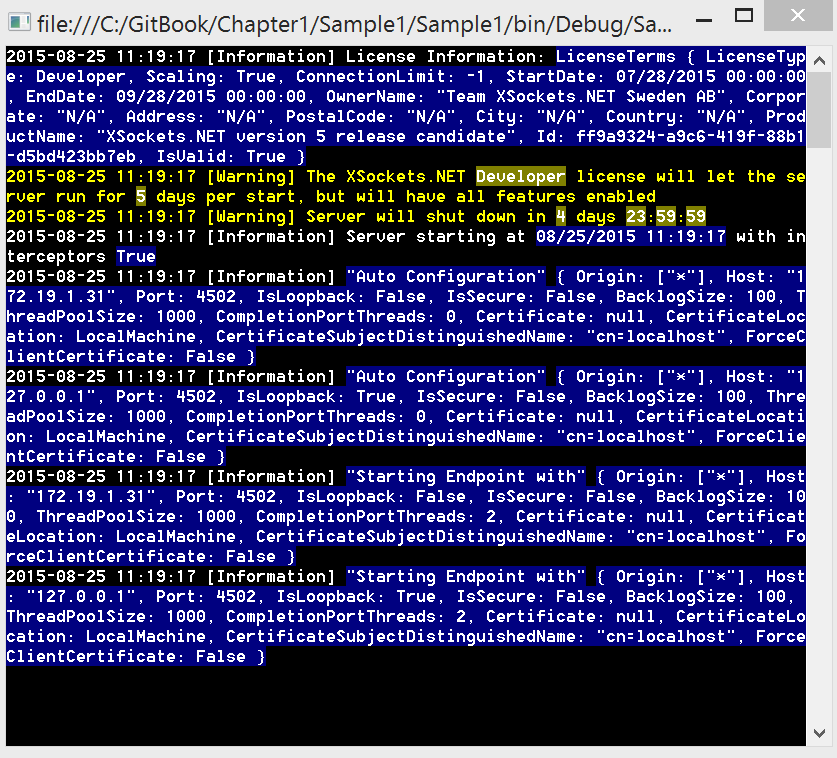
We see some information about the server:
- At the top we see some license information.
- Then we see that the server created 2
auto-configurations. One for localhost and another for the machine ip. - At the bottom we see information about both configuration endpoints being started.
5. Connect and send some messages
As we saw in step 4 the server was auto-configured and started an endpoint on localhost port 4502. This means that we now can connect to the server and use the built-in controller named generic. The generic controller is very simple, it will broadcast all messages coming in to all clients connected to that controller.
There is a few protocol included in the server by default. You can see them if you look at the referenced assemblies (marked in red below).

So you can see that we have Rfc6455 (websockets), Mqtt, Json and Putty.
Putty is the simplest of these protocols and is only in there for demo purposes.
Note: You can remove any protocol assembly that you do not want to support, or add new ones that you write your self. It is just modules/plugins
As all protocols the Putty protocol expects you to send a handshake when connecting. The handshake is simply "PuttyProtocol"
Then the protocol expects us to send data in the format controller|topic|data
This means that we can send generic|say|hello
So now open up a instance of Putty, connect to localhost and the port 4502. You will also have to choose RAW as the connection type
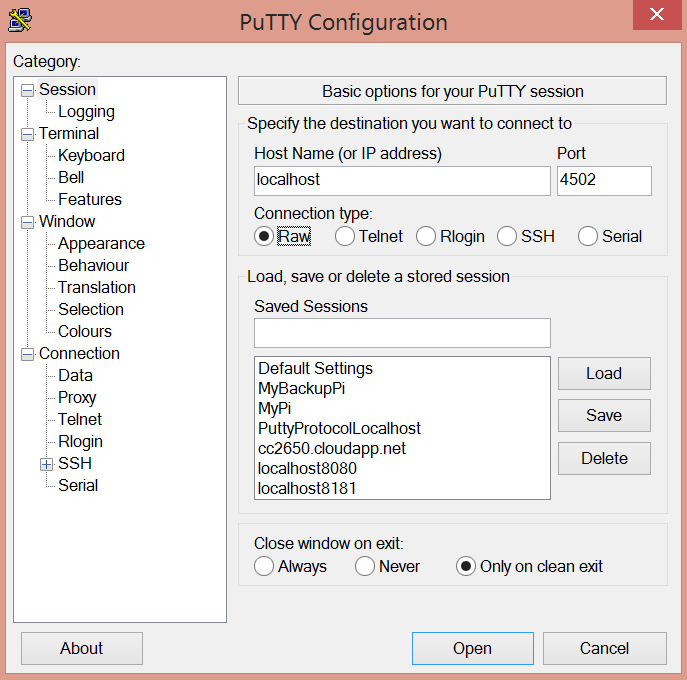
Then type in the handshake "PuttyProtocol" and press enter. This will connect you to the server and the protocol will respond with a message

Now type "generic|say|hello" and hit enter.

As you can see the message arrived back to the client, and you also got some information about the connection you just opened.
Now open up another Putty instance and you will be able to send messages between them
